Showing posts with label Distress Inks. Show all posts

Thursday, September 15, 2011

More Steam Punk and a Sale

Hey, Crafty Friends! Quick post today - I made these cards with the leftovers from a card I made last week. You can see it HERE. They were lots of fun to make and it made me happy to use up my scraps instead of just adding them to the mountain that rests in the middle of my craft room. ;) Also - Lindsay is having a sale at Mygrafico - click the sale banner and check it out! Click HERE to go to Lindsay's blog for links to her fabulously talented design team's blogs for more inspiration. Thanks for stopping by and have a great weekend!!!
Supplies:
Gears: Lindsay's Stamp Stuff
Stamps: Invoke
Ink: Distress Inks (Black Soot, Stormy Sky & Vintage Photo), Ranger Alcohol Inks (Copper & Silver)
Embossing Folders: Tim Holtz
Paper: Bazzill
Glue: Helmar (Liquid Scrap Dots & Acid Free)
Eyelets:

Thursday, September 8, 2011

STEAMPUNK DREAMS

Happy Thursday, Everyone! It has been raining here all week, so that makes it perfect paper crafting weather ;) And since I have been thinking about the new school year (ds is a Senior this year) and dreaming of all the possibilities that lie ahead for him, I created this card.
I started with BAZZILL card stock for the base of this 5 1/2 x 5 1/2 card. The pattered paper is from Lindsay's Stamp Stuff's Vintage Sheet Music FREEBIE! (click the link for a FREE download) I love the way this paper looks old and smudged. Of course, I had to give it some extra smudges with my TH Distress inks...but I digress...What I think is the COOLEST part of this card is the gears! Did you think they were metal? Guess again. They are just plain ol' Staples cream card stock, colored with copper and gold alcohol inks, then sanded and distressed with-you guessed it-more TH Distress inks. These cool gears are also part of a LINDSAY'S STAMP STUFF svg set (STEAMPUNK). I used my cricut and SCAL to cut them out and Helmar Liquid Scrap Dots to adhere them with dimension.
That's it for today. Be sure to stop by Thefrugalcrafter's Weblog for a cool video she made demonstrating different airbrushing techniques and a peek at the rest of her talented design team's projects this week. Thanks for stopping by!

Wednesday, August 24, 2011

Create Bliss

Hi Everyone! I was in a crafty mood today and entered a challenge at a site called Paper Hoarders. For the challenge, we had to use lace on a tag, so this is what I made:
I have been wanting to use this dress form from LINDSAY'S STAMP STUFF on a project and today I figured out what I wanted to do with it. I cut out the pieces using my Cricut and SCAL, but if you don't have a Cricut or SCAL you can use the jpeg printables that are included in these sets. I used Distress Inks on the tag, doily sash, measuring tape and the buttons.
I stamped CREATE in the corner (Invoke), embossed the lower edge with a cuttlebug folder then glued all my pieces down with Helmar Acid Free glue and used Liquid Scrap Dots (for dimension) to adhere the buttons. I wrapped the spool with some embroidery thread and attached it to the tag with various ribbons, threads and yarns.
Here are links to the sets I used:


This project was sew much fun to make! That's all for today. Thanks for stopping by, and until next time, happy creating!

Thursday, February 17, 2011

The Game - Steampunk ATCs

Happy Thursday! I am home again after a much enjoyed vacation. We spent time in Las Vegas, Arizona and California. It was a wonderful trip, but it is always good to be back home. Today I have a set of ATCs to share with you. I made these for a swap at the Stamp Shack using one of the gears in the Steampunk SVG Set from LINDAY'S STAMP STUFF. I have had the "wind up man" stamp for a long time, just waiting for the right time to use him. I'm not even sure where I got him, and he isn't labeled, but I just knew I had to have him. :) The book pages are from a novel called Saratoga Trunk. ( I didn't read it, but it sounded kind of "steampunky".) LOL I used Tim Holtz distress inks to age the pages and added special embellishments bought on a trip to Texas. Here is a preview of the Steampunk SVG set:
Make sure you check out Thefrugalcrafter's Weblog for more inspiration, possibly a freebie, and links to the rest of Lindsay's Fabulous Design Team's blogs.
For more Steampunk Inspiration check out Suzi's Scraps. Suzi used the train from Lindsay's Steampunk Stamp Set to create a fabulous set of Steampunk ATCs for the same swap! Leave her some love when you stop by and let her know what you think. I'm sure she will appreciate it. Until next time, Happy Crafting Everyone!

Saturday, January 15, 2011

Let Your Heart Take Flight

Just a quick post today...Are you all having a great Saturday? Yes? Want to know how it can be even better? Check out the 25% off sale at Mygrafico today and tomorrow! You can buy THIS set from Lindsay's Stamp Stuff, and make cards with ticket embellishments! This is the second card I have made with this set. Check yesterday's post to see the first one. I also cut out some larger tickets, and have ideas for them as well...so plan on seeing more of them in the very near future! Have a great weekend, and happy stamping!

Thursday, January 13, 2011

Listen to Your Heart

Happy Thursday, Everyone! Since were were having a snow storm Wednesday, I thought I would craft up a storm here in my cozy basement. I decided to make a couple of Valentines with my rubber stamps (INVOKE), patterned papers and the Fun Fair Ticket SVG file (LINDSAY'S STAMP STUFF). I just sized the ticket to work with the stamp set using SCAL with my Cricut and started cutting and stamping! What fun! I cut a 12x12 sheet of tickets, so I now have a bunch of blank tickets on hand to be used for any occasion! I think I even have a few Christmas stamps that would work well too... I really like the idea of an SVG, rather than a die for this design, because I can resize the file to suit my needs. I can go small for the stamps I used, or go larger for some others-more to come :) and even larger for journaling! Be sure to check out Lindsay's Blog for a fun Valentine Freebie she has posted, and see what the rest of her design team has created this week. Sadly, today we are saying goodbye to Design Team Member Laurel Seabrook. Best of luck to you, Laurel, and Happy Stamping Everyone!
SUPPLIES:
Card Stock: STAPLES
Red, Kraft Paper: THE PAPER COMPANY
Patterned Papers: LINDSAY'S STAMP Sweet Stitches
Ticket SVG: LINDSAY'S STAMP STUFF Fun Fair SVG Set
Heart Die: TIM HOLTZ
Distress Stickles, Embossing Folder: TIM HOLTZ
Rubber Stamp: INVOKE
Markers: BIC

Thursday, October 28, 2010

You're Just My Type

Wow, Thursday sure rolls around fast these days! I have a set of Artist Trading Cards (ATCs) for you today. I am in a swap at the Stamp Shack (of course) and the theme for this set is "That's So Funny". We had to create a set of ATCs with some kind of play on words, so I put on my thinking cap and got out my STEAMPUNK and SCHOOL PAPERS sets from LINDSAY'S STAMP STUFF and went to work. I covered my digital canvas with the ledger paper and then layered the typewriter over it. I added the text "You're just my" on the next layer and then sized it to 2.25 x 3.25 and printed a sheet of them and cut them out. I then stamped "type" on each one using letters from My Sentiments Exactly, swooshed a bit of black soot distress ink around the edges for extra depth and added a few dots of distress stickles in the corner. That piece got mounted on a black cardstock panel and that completed the front. Easy peasy!
Next, I decided to print up the ATC back FREEBIE that Lindsay has in her Mygrafico Shop. I think it's nice to put some information on the back to let the collector know a bit about the card. I love making greeting cards and doing mini books, and lots of other paper crafts, but I think ATCs are my very favorite pieces to create. I just love making and collecting them! Each one is so different and unique, even though we all have the same basic theme and instructions.
Since it's almost Halloween, I thought I would give you a last peek at a couple of the great Halloween sets Lindsay has in her Mygrafico Shop.
The Creepy Crow set is my all time favorite, but the Too cute to spook set is fun too! Gobble them up while you still have time to eek out a few more Halloween cards! Here is the DT list for this week...you know the drill! Have fun and happy digi stamping!


Lindsay Weirich (Owner and Stamp Designer)

Cheryl Gorka DT Coordinator

Shannon Neparko

Margie Visnick

Lisa Jurecek

Melissa Craig

Tamara Bennett

Cindi Hooks

Micki Harper

Karin Martin

Jennifer Bliss

Rhonda Walker

Diane Bove

Tracy Vinson

Laurel Seabrook

These girls rock! I hope you enjoy their creations as much as I do!


Thursday, October 14, 2010

Best Witches

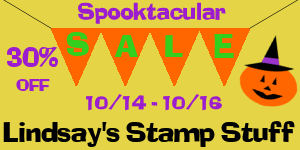
Happy Thursday, Digi Stampers! It's a very happy Thursday, because from now until Saturday, everything at Lindsay's Stamp Stuff is 30% Off!!! How can you NOT click over and do a little shopping??? She has some great Halloween sets and a few new Christmas sets, along with some great all occasion images and sentiments - and don't forget those scrumptious SVG sets.
This week, I have chosen to use a FREEBIE that Lindsay posted a few weeks ago (the freebie is at the end of her post). I just love this image and had to use it! I "colored" it with my Tim Holtz Distress Inks (spiced marmalade and peeled paint with a touch of milled lavender) and then gave it a little sparkle with brushed pewter distress stickles. I layered up Bazzil card stock with bo bunny patterned paper and added a few Prima Flowers for fun. I painted a bit of the stickles on the brads and flowers and then to finish, I stapled the corners with my tiny stapler (Tim Holtz). Super quick and super easy -My kind of card! (Smiling)
Lindsay's Fabulous Design Team has been hard at work this week, creating lots of projects and cards for you to be inspired by. Check them out and then fly over to her Mygrafico Shop and take advantage of her Sale! You can get wholes sets of stamps and SVG sets for just a couple of dollars - and I know Lindsay has a freebie for you on her blog today, so get started there!


Lindsay Weirich, Owner & Designer

Cheryl Gorka DT Coordinator

Shannon Neparko

Margie Visnick

Leanne Garner

Tamara Bennett

Cindi Hooks

Micki Harper

Karin Martin

Jennifer Bliss

Rhonda Walker

Diane Bove

Laurel Seabrook

Thursday, September 16, 2010

A Quick Halloween Card and a Sale!

Lindsay's Stamp Stuff is having a September Sale!!! 30% off everything in her Mygrafico shop through Friday! I was looking for inspiration so I went over to 2 Sketches 4 You and found a great sketch to get me rolling. I started with a stamp from Lindsay's Stamp Stuff (creepy crow set). Once I printed it, I die cut it with my scalloped nesties and distressed it with Tim Holtz faded jeans ink. I stamped "eek!" (studio g) on the journaling lines, then I plopped a dollop of Stickles all around it. I decided to use a black card stock base and a bright orange coordination's panel. They have sparkly paper now and it is super cool! Click the image and I think you can really see it! I cut a strip of Heidi Grace paper for the middle and stamped the spider (studio g) and added a few self sticking gems to give it a little more bling. Easy Peasy! Thanks for stopping by! Check out Lindsay's new freebie this week and see what her fabulous Design Team has created. See you again soon and don't forget about the sale...


Senior Design Team *Watch for their projects every Thursday!

Lindsay Weirich (Owner and Stamp Designer)

Cheryl Gorka DT Coordinator

Shannon Neparko

Margie Visnick

Lisa Jurecek (not posting today)

Tracey Allen

Melissa Craig

Leanne Garner

Tamara Bennett (not posting today)

Cindi Hooks

Micki Harper

Karin Martin

Jennifer Bliss (not posting today)

Rhonda Walker

Diane Bove

Tracy Vinson

Laurel Seabrook

Tuesday, September 14, 2010

It's all Fun and Games until somebody loses an EYElet!

Are you tired of my ATC swaps yet? LOL I couldn't resist this one, just because of the name! This swap required us to use at least one eyelet, so, I HAD to use it on an eye! I thought of this cute owl stamp I had (studio g) and decided to use it. I stamped it with Distress Ink, distressed it with more distress ink, added my eyelet and cut it out. I distressed the base with more distress ink (sorry Lindsay!), added the swirl (studio g) and glued on the owl. I hadn't done many swaps this summer and I seem to be making up for lost time! It's always so much fun to get everyone's creations back in the mail. Anyway, just thought I'd share. Have a wonderful day, and keep an eyelet out for more ATCs!

Saturday, September 4, 2010

I Wish I were a Fish!


With all the HOT weather we have been having this past week here in Maine, I do wish I were a fish! I made these ATCs for a Stamp Shack swap. I used Tim Holtz Distress Inks for the back ground. I used a masking technique on these, something I had never tried before! Can you believe that??? It was super fun and so easy to do. The grass stamp is by Stampscapes and the others are studio g. I also added a bit of Rock Candy Distress Stickles in the bubbles, just for fun!

Thursday, August 5, 2010

A Pocket Full of Posies!

Hello, it's Thursday again and that means another project using stamps from Lindsay's Stamp Stuff. This week I made this collage piece with the Jean Pocket stamp from the Patriotic set. I started by coloring the pocket and adding brads in the corners and adhered it to a leftover piece of bo bunny paper (that I just love). Then I began adding different Prima flowers and leaves with assorted buttons and brads for the centers. I stamped random butterflies around the page and added a bit of stickles to them for some bling. I printed the sentiment on my computer and inked it with spiced marmalade distress ink. Lastly, I added a musical note brad, inked the edges of the paper and done! You can buy this stamp set and lots more fabulous sets at Lindsay's Mygrafico shop. Hop on over to Lindsay's blog and grab her freebie of the week and then see what the DT has to inspire you with as well. Have a great Thursday!!!

This qualifies for the following challenges:

ABC Challenges: A is for August
Alphabet Challenge: Nature
Crafty Ann's Challenge Blog: Lazy Hazy Days of Summer

Thursday, May 6, 2010

Quick Mother's Day Card

Happy Thursday!!! It's digi stamp day! Today I have made up a very quick and easy card for my mom for Mother's Day. I chose the bird on the sunflower stamp from Lindsay's Stamp Stuff from the Pretty Primitives set and colored it with my Bic Mark Its. The patterned papers I used are from BoBunny and DCWV. The bling is self sticking from K&Company. I aged the edges of some of the panels with Distress Inks and that was it. Easy peasy~especially good for those last minute "whoops, I forgot..." cards! You can find more Mother's Day cards and projects on Lindsay's blog, as well as the other Design Team Members. Check them out, leave them some love, and pick up a freebie! Have a great week, Everyone!

Thursday, April 29, 2010

Hi Everyone! Happy Thursday!!! Well, it will be a happy Thursday as soon as I get my computer back. I got that nasty facebook virus last week, and my computer is finally ready. YAY!!!! Could you hear me shouting for joy? Fortunately, I have a netbook, so I am able to do a post for you this morning.
This Alice in Wonderland card is a white card stock gate fold base. I adhered two pieces of DCWV paper on the front as well as 6 sticky rhinestones in the corners. I cut out the blue (DCWV) flower shape with my nesties and then cut the Alice stamp out with a smaller flower. I blended Tea Rose Distress Ink around the stamp, colored it in and added Stickles to the edges so it would blend with the sparkly papers. You can get this stamp and many more at Lindsay's Mygrafico shop. Check out her blog - Thefrugalcrafter's Weblog for her freebie this week, see what fabulous projects she has created for you to drool over and a list of links to her fabulous design team member's blogs. Wow! It's good to be back! Have a great week, and Happy Digi Stamping!!!

Wednesday, April 14, 2010

Lindsay's Stamp Stuff Anniversary Blog Hop!

Welcome to the LINDSAY'S STAMP STUFF Anniversary Blog Hop! Wasn't Tanya's project great?! If you didn't come from Tanya's blog, be sure to visit Lindsay's blog and start the hop from the beginning. If you get lost along the hop, you can always see the list on Lindsay's blog.
There is so much happening this week!!! Lindsay is hosting a CROP over at MyGraficO. It started Tuesday, and will continue on through Thursday. She has several fun challenges posted there with fun freebies each day-but get the freebies while they are free because at the end of the crop, they will go into for sale sets that you can buy. If you haven't already joined MyGraficO or the crop, click HERE to find the instructions and links on how do it.
Now, for my project! This is another one of those projects I started and never finished. I was inspired by a wall hanging in an old Country Marketplace magazine (Holiday 2006) done by Katie Estvold of Sparrow's Cottage. Rather than trace and cut out her pattern, I printed and cut out stamps from LINDSAY'S STAMP STUFF to use instead. I used the crow from the CREEPY CROW SET, the house from the PRETTY PRIMITIVES SET, and a flower from the DOODLE FLOWERS SET. I started by cutting my borders, corners and background (bo bunny, Daisy D). I printed the crow on the red paper, so he would have some nice color. The house and flower were printed on white card stock, (GP)then colored with my bic mark-its. I cut the hill from cream card stock (Staples) and the hilltop and leaves were cut from the red paper. I cut the word HOME using my cricut with the George cartridge. I glued everything down onto an old pizza box (way to recycle!) and drew in the flower stem, stamen and hanger for the house. I noticed the patterned paper had white flowers which didn't go well with the cream colors, so I aged the whole piece with Distress Ink (antique linen) and liked it much better. I then cut the box to size and glued the buttons in the corners, added my hanger and done! The finished piece measures 10x12 inches.
Now lets start hoppin! You have a chance to win a digital stamp set on every DT members blog! Leave a comment for one chance to win- that is all you have to do! If you want a second chance to win place this fan badge on your blog and leave another comment.

Now get hoppin! Be sure to leave some love so you can win some stamp sets, don’t worry, if you buy something during the 50% off sale and end up winning the same set, Lindsay will let you pick a different one. I am giving away the CREEPY CROW SET.
To continue on your blog hop, go to Cindi's Blog, where I'm sure you will find a fun, fabulous project!

Friday, March 26, 2010

Distress Tags!

Happy Friday, Everyone! I was up and at 'em early this morning and couldn't stop thinking about the new Distress Inks I got at Judy's Scrappin' and Stampin'. I created these three tags using a few simple techniques I saw at Two Peas in a Bucket. For the blue tag, I inked up the tag using Broken China. Next, I used the Embossing Ink to ink up my crackle background stamp from Stamp Camp. Once that was inky, I sprayed it with water and stamped the tag, dried it with my heat tool and got that nice crackled look. I think it almost looks like water! I stamped the sentiment (Hero Arts) and the text background (Dimensions) on the Prima using Vintage Photo. I cut the stem and leaves from a brown scrap and added cool dew drops made by my friend Lindsay, of Lindsay's Stamp Stuff! She has a great tutorial video on her blog. Click HERE to see her video and make your own dew drops. The second tag was made by inking up the tag with Rusty Hinge, Barn Door, and Peeled Paint Distress Inks. Next, either spray or splash water drops onto the tag and dry with heat tool. I colored the flowers with Barn Door and Peeled Paint and attached a bronze brad for the center. I cut a stem and leaves from scraps, stamped the sentiment in the corner with Vintage Photo and added those fun dew drops to finish it off. The leaf was attached with pop dots for dimension. The third tag was made with a combination of Spun Sugar, Bundled Sage and Pumice Stone inks. I colored the flower with Tattered Rose and stamped the text background on it with Vintage Photo, as well as the sentiment (Hero Arts). I added the button center and Prima leaf along with more of the dew drops for embellishments. These were really fun to make and they were not difficult! -My kind of work! LOL Anyway, I would love your comments-they make my day!!! Thanks for stopping by and Happy Distressing! ;)

Thursday, January 21, 2010

Digi Stamp Thursday - Birthday Cards!


Hi Everyone! I have Birthday cards on the brain today. I joined a swap at the Stamp Shack~ make 5 Birthday cards each month for my "stash". Since we were snowed in here in Maine last night, I made cards. And, since it's Thursday, I used a couple of digi stamps from Lindsay's Stamp Stuff. The Bird is from her "Love Grows Here" set, and the cupcake is from the "Sweet Stuff" set. These were all quick and easy to put together! My kind of cards :)
Don't forget to check out Lindsay's Blog for her fabulous projects this week and to see what the rest of the Design Team has created. See you again soon...I'm in a Christmas Card swap too! LOL

Wednesday, January 13, 2010

Basic Grey, Babies and Bows!


It's Thursday and that means it's Digi Stamp Day with Lindsay's Stamp Stuff! Yesterday I went shopping with Cindi (one of our talented Design Team Members) and then we met Lindsay (of Lindsay's Stamp Stuff) for lunch at a local Thai restaurant. We all enjoyed delicious food and had a great time. While Cindi and I were shopping, I found (what I thought) was going to be a versatile embossing folder that I could use for birthdays, Christmas.... Turns out, when I got it home, it was for baby cards. If you look closely, you can see a baby bottle and booty in the embossing. So...I decided to keep it anyway and use it with the BABIES AND BOWS stamp set that Lindsay designed. I really like how this card turned out. It could be used for a baby shower or for a new baby. With a different sentiment, it could be used for a baby's first birthday as well. I wanted to use non-traditional colors instead of predictable pastels. To give the card a more "finished" look, I added faux stitching to the card stock panels and was able to meet a challenge at the Sunflowers and Dragonflies challenge blog.
This Thursday and Friday EVERYTHING at Lindsay's MyGrafico Shop is 25% off! They are having an anniversary sale - but hurry! The sale ends at Midnight on Friday. (GMT) By using her MyGrafico Shop you can not only save 25%, you also get to instantly download your stamp sets!
Be sure to check out the DT blogs and admire their fabulous creations. Happy Digi Stamping!!!


Supply List:
PrismaColor Markers-
Dark Brown
Sand
Spanish Orange
Terra Cotta
Violet Mist
Lilac
Staples Cream Card Stock Base
Bazzill Card Stock- Purple, Orange
Basic Grey patterned papers
making memories brads
Prima Flowers
Sizzix Embossing Folder
Stampin' Up Corner Punch
Distress Ink - spiced marmalade
Distress Stickles - Picket Fence
Black fine tip marker
Digi Stamps - Lindsay's Stamp Stuff

Thursday, December 3, 2009

Best Friends


Happy Thursday! I hope you all had a wonderful Thanksgiving. I have finally awoken from my turkey induced coma and have a project for you using pieces from a couple of Lindsay's Stamp Stuff stamp sets. This week I made a project using a 5x5 canvas from Joanne Fabrics. It had a large dragonfly on it, but I painted over it with gesso, and then two colors of light green acrylic paints. Next, I cut some small pieces of coordinating CK Scrappin' Creations Power Pad and layered them over the painted canvas using matte gel medium. I added more layers of paint, Distress Inks, and paint colored with Alcohol Inks until I had a look that I liked. Actually, I think I got a little too much ink, but that's ok. You still want to be able to see some of the papers through the layers. Oh-and you need to let each layer dry before adding the next. I used my heat tool to speed things up - no patience, you know!
At this point, those of you (who are not me) would get out your graphite paper and trace the fabric flower stamp onto the canvas. If you are me, you cannot find your graphite paper and start to panic until you remember Lindsay's "trick". The trick is to color over the back side of the printed image with a pencil. Then lay the image on the canvas and trace over it with your pencil. This transfers the image, just like graphite paper! At this point (if you are me) you are thinking you may never look for that paper again! This part was too easy!

Once the image has been transferred to the canvas, paint it and let it dry. Add details with your prisma pencils to the leaves and outline the whole image with a charcoal pencil. Add a gemstone brad for the flower center. Print, cut out, and ink up the "If friends were flowers" stem and the heart and star from the "Patriotic Elements" set. Attach them with the gel medium and dry. Stamp "best friends" with Distress Ink, distress the edges and you are done.


You can get the Doodle Flowers Set and the Patriotic Elements set at Lindsay's Stamp Stuff or if you want instant gratification, you can download them at her MyGraficO! shop. Check out the cool projects the Design Team has for you to be inspired by this week! And don't forget - Lindsay always has awesome freebies on her blog, The Frugal Crafter, so start there and check it out! Happy Digi Stamping!!!